BrainSimulator’s Overview
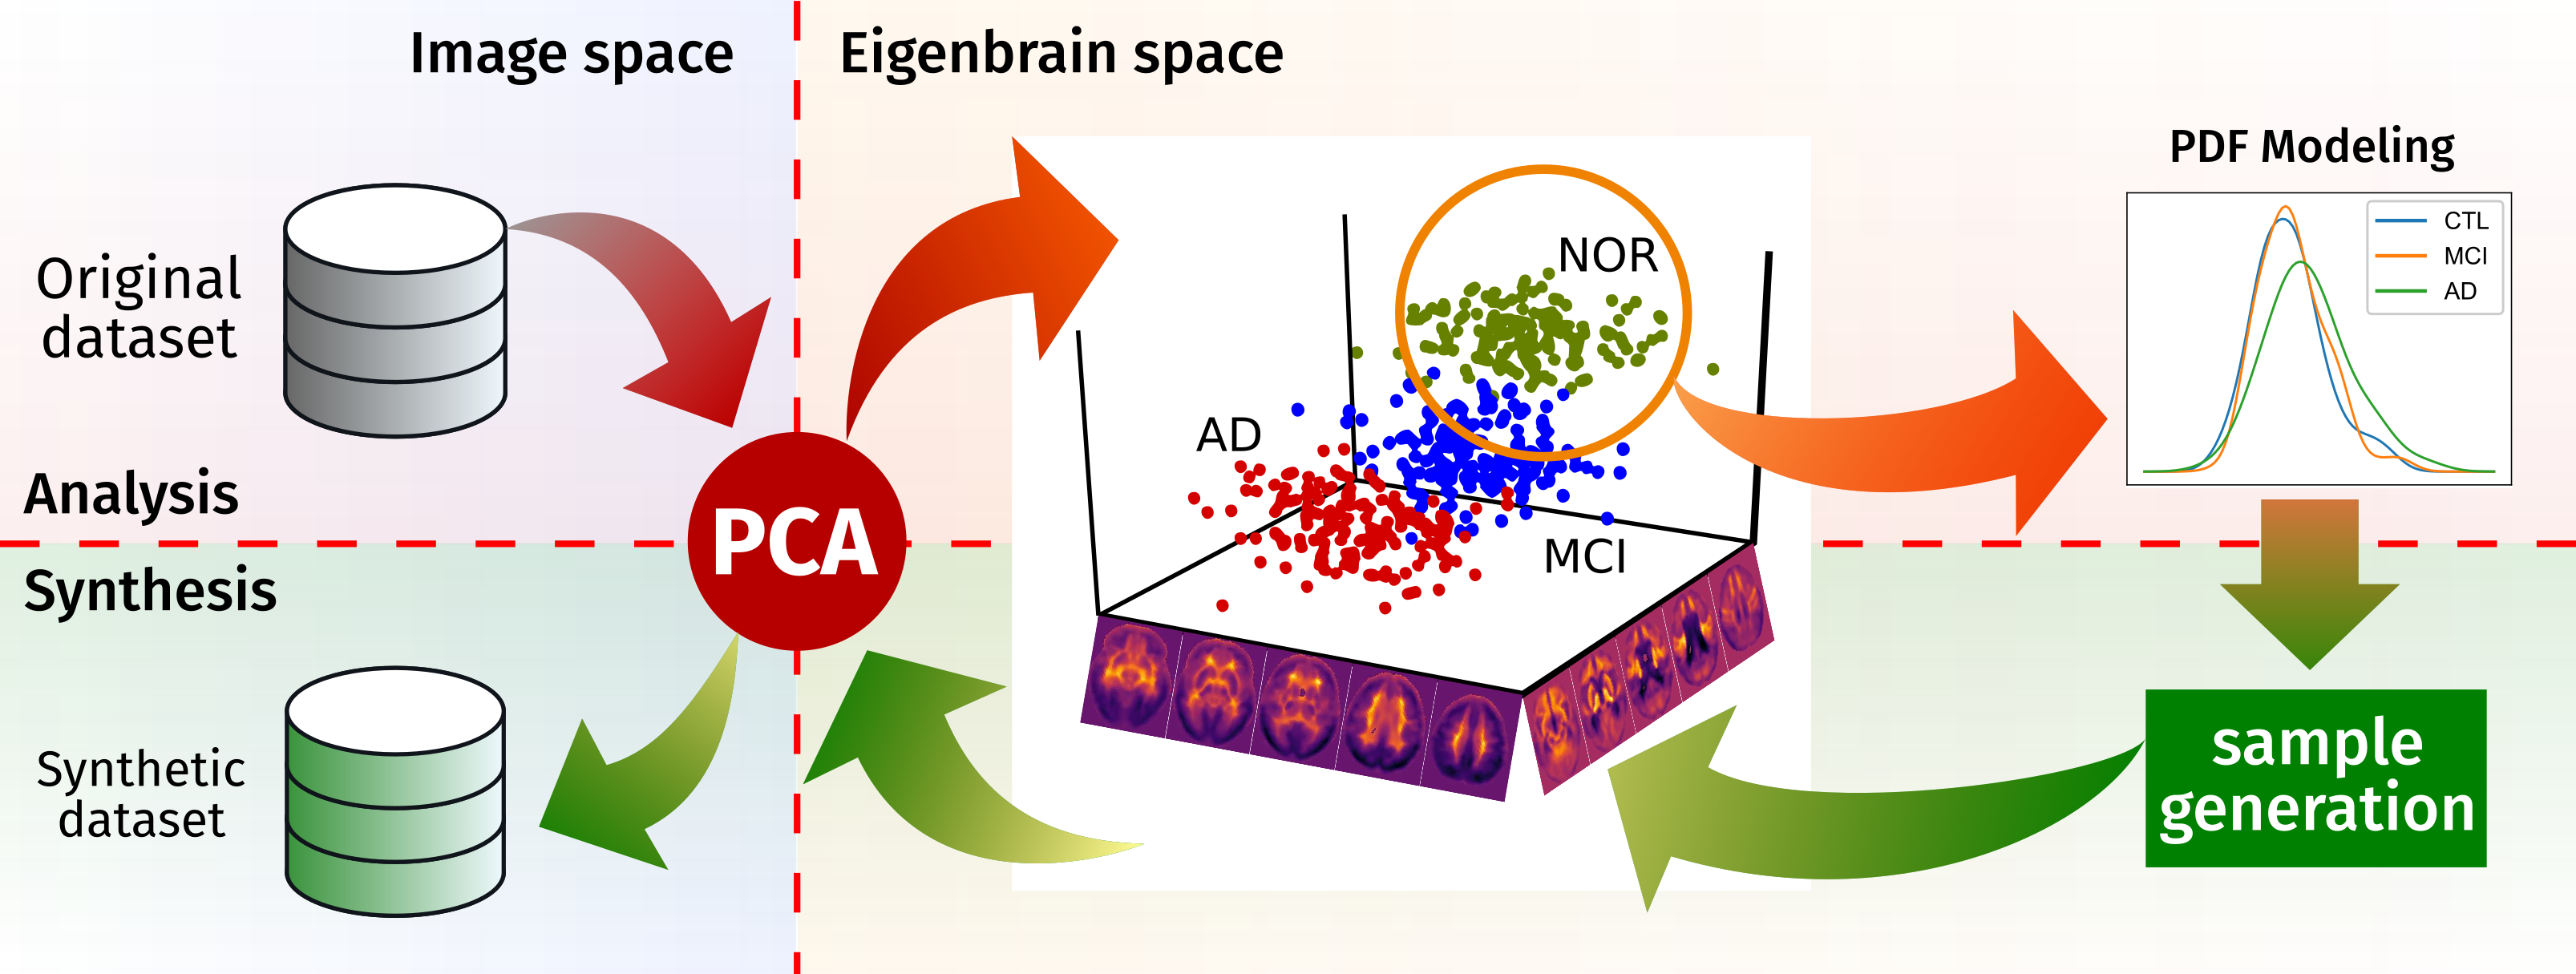
brainSimulator is a brain image synthesis procedure intended to generate a new image set that share characteristics with an original one. The system focuses on nuclear imaging modalities such as PET or SPECT brain images. It analyses the dataset by applying PCA to the original dataset, and then model the distribution of samples in the projected eigenbrain space using a Probability Density Function (PDF) estimator. Once the model has been built, anyone can generate new coordinates on the eigenbrain space belonging to the same class, which can be then projected back to the image space.
Installation
brainSimulator is now available via pypi and can be installed directly from:
pip install brainSimulator
Alternatively, download the package, uncompress and execute:
cd /path/to/uncompressed/brainSimulator/
python setup.py install
Quickstart
The “stack”
The first key concept here is a stack. A stack is a bidimensional numpy.ndarray of size N`x`K, where N is the number of brain images available and K is the number of voxels in each image. It is important to remark that all images must have been registered to the same brain space (recommendation: use MNI space). Use a similar code to this to generate a stack:
import os
import nibabel as nib
import numpy as np

def create_stack(list_images):
        i=0
        labels = np.array(len(list_images))
        for im in list_images:
                image = nib.load(im)
                labels[i] = get_label(im) # get the image label
                if i==0:
                        stack = np.zeros((datos.shape[0],image.shape[0], image.shape[1], image.shape[2]))
                stack[i, :,:,:] = image.get_data()
        return stack, labels
Creating the brainSimulator object
With the new version, the whole interface has been switched to an object. This allows to train the model once and then perform as many sample drawings as required. To do so, we simply navigate to the folder where the simulator.py is located (if that folder is added to the path, that is not necessary), and import the module:
#navigate to the folder where simulator.py is located
import brainSimulator as sim

simulator = sim.BrainSimulator(algorithm='PCA', method='mvnormal')
There are different PDF modelling methods: mvnormal, gaussian and kde. Other methods based on alpha-stable distribution are planned for the future. The most accurate method is the mvnormal, but it requires some further tuning of the parameters. A high number of components may lead to overfitting, producing, when n_comp tends to infinity, always the average image of each class. For its part, the kde method is less accurate, but it works essentialy out of the box. Use them at your discrection.
Fitting the model
Once the object has been created, we use the stack and its labels to fit the model:
simulator.fit(stack, labels)
This procedure may take some time, depending on the PDF estimation method.
Generating a new dataset
Once the fitting procedure has finalised, you can generate a new dataset using the trained object:
new_stack, new_labels = simulator.generateDataset(N=200, classes=[0, 1, 2])
This will generate 200 new samples for each class in 0, 1 and 2, ready to use in our favourite machine learning algorithm.